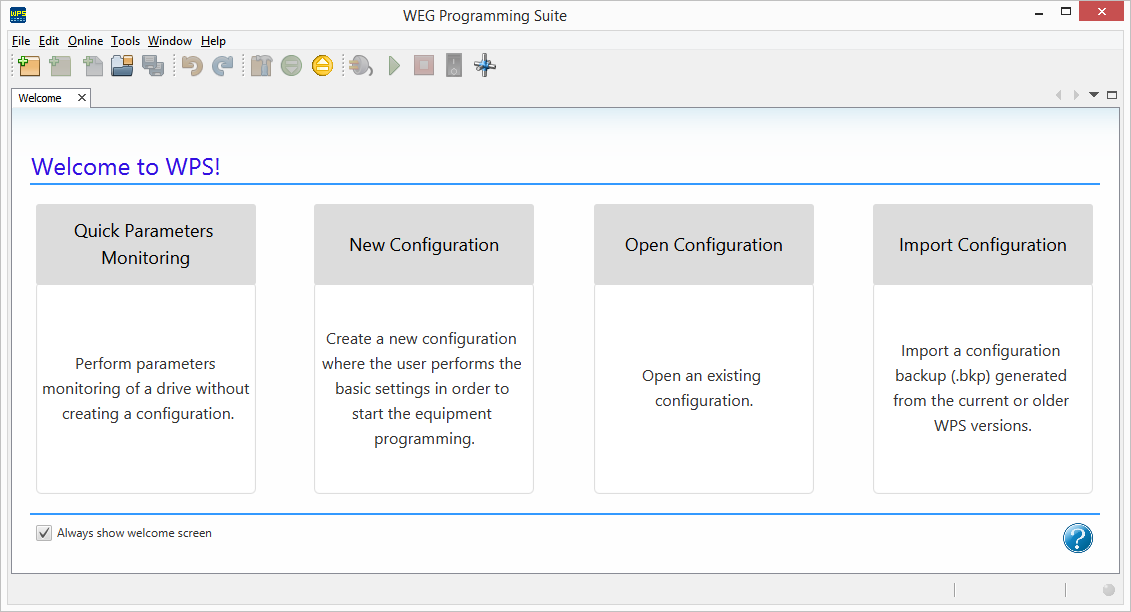
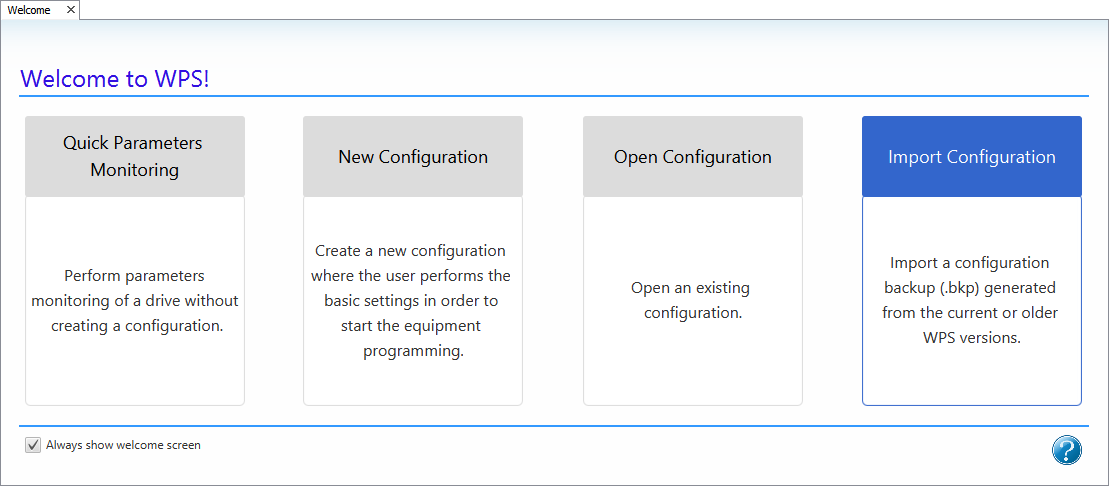
Welcome Window
This chapter provides some basic information to familiarize you with the software.
We'll start with the welcome window.
The welcome window appears when the program is launched for the first time.
The following options are available in this window:
- Quick Parameter Monitoring
- New Configuration
- Open Configuration
- Import Configuration
There is also an option to Always show welcome window, which will be explained below.
The user can also close this window, without executing any of the options, and use their own workflow.
The following figure shows the WPS welcome window.
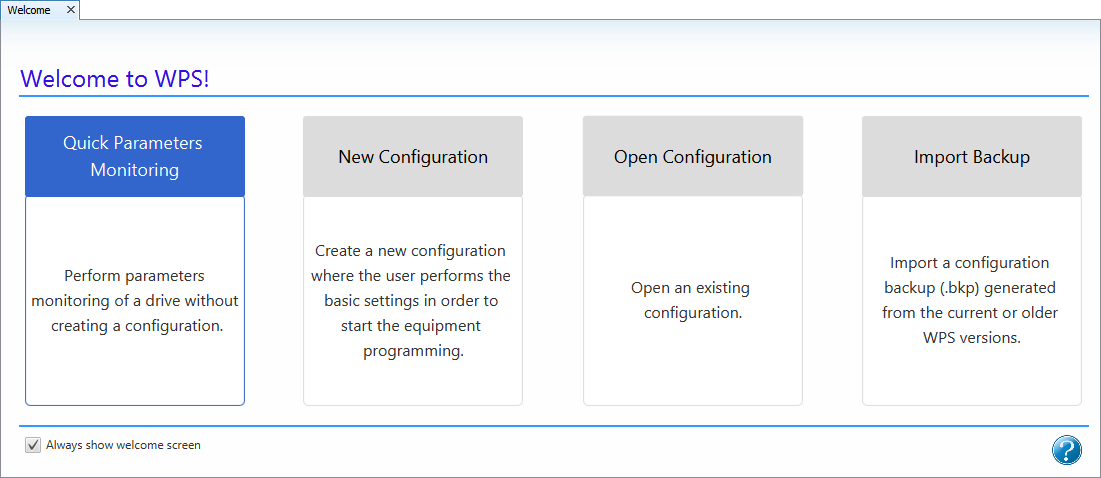
Quick Parameter Monitoring
Quick parameter monitoring allows you to view and change parameters online, but it cannot create a new configuration or save the parameters to the computer.
1) Function Selection
Click the Quick Parameter Monitoring option.
2) Communication Configuration
The next window sets the communication options with the device.
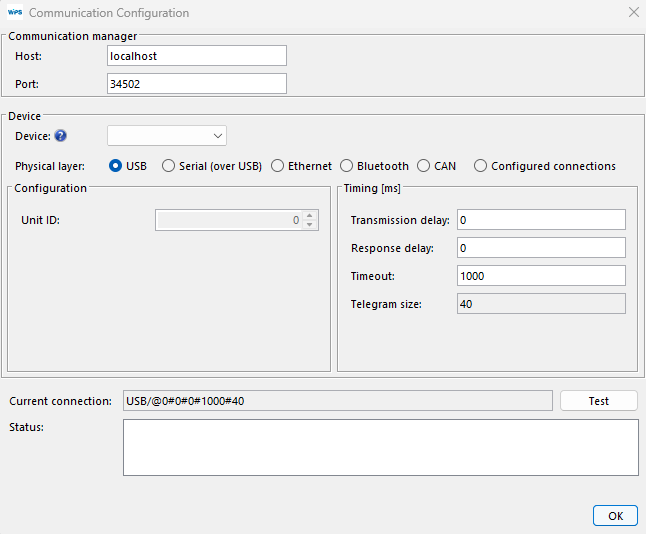
3) Communication Options Selection
Choose the correct communication options.
If you select a device, the device's default communication configuration will be loaded in the window.
However, make sure the window's configuration matches the device's configuration. If not, update this window according to the device's configuration.
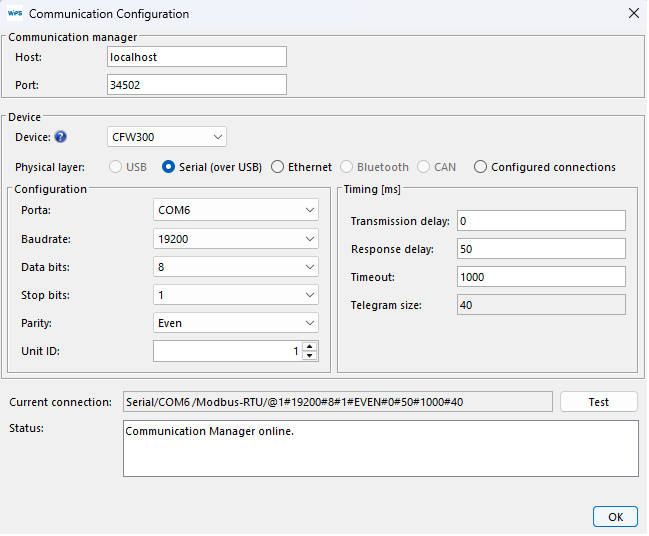
4) Testing Communication
You can verify that communication is correct by clicking the Test button in this window.
The status field is updated. The connected device appears in the status field.
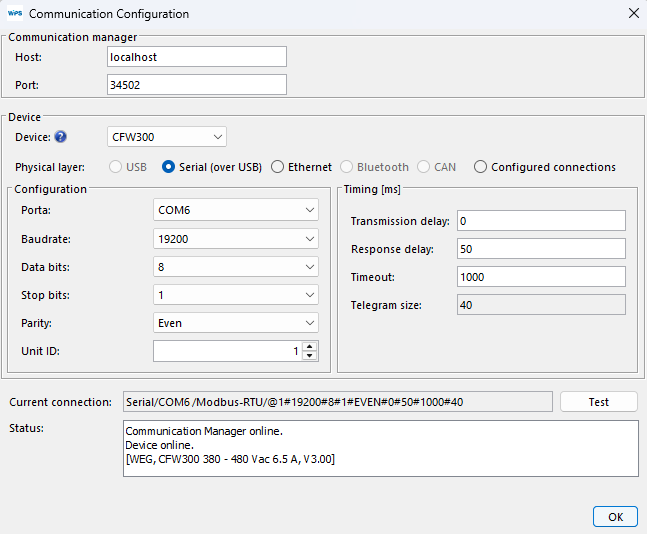
Then click OK.
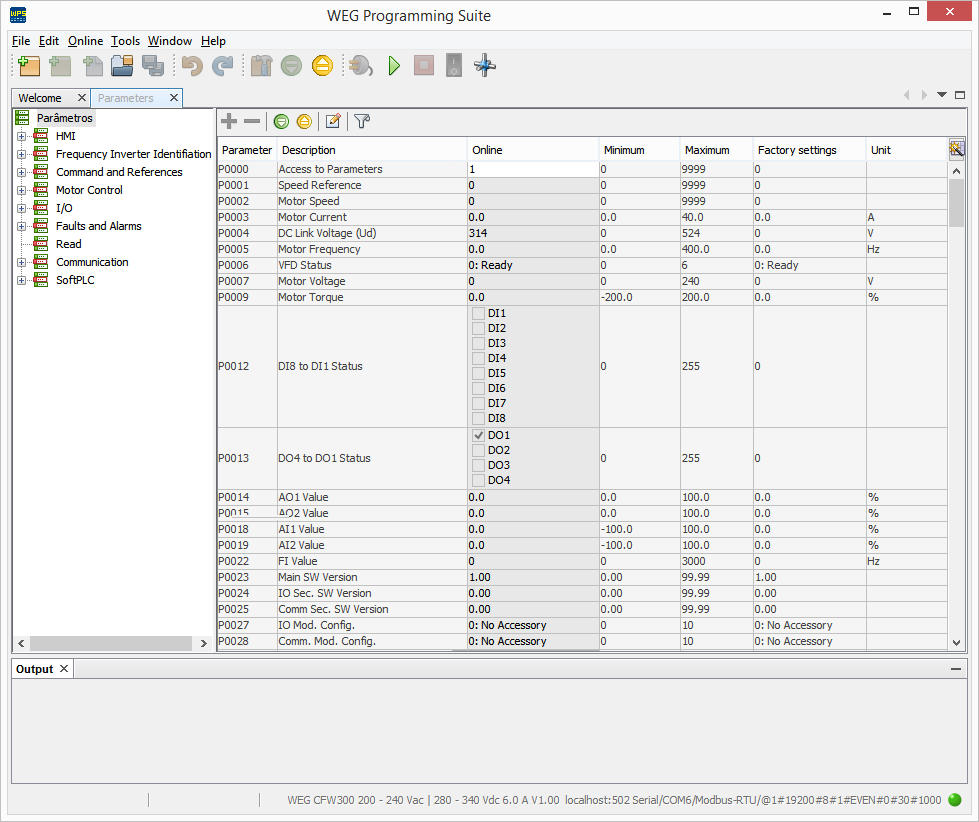
5) Running Monitoring
A window with all device parameters appears.
The Online field displays the actual values of the device parameters, with most parameters being modifiable. Read-only parameters cannot be modified.
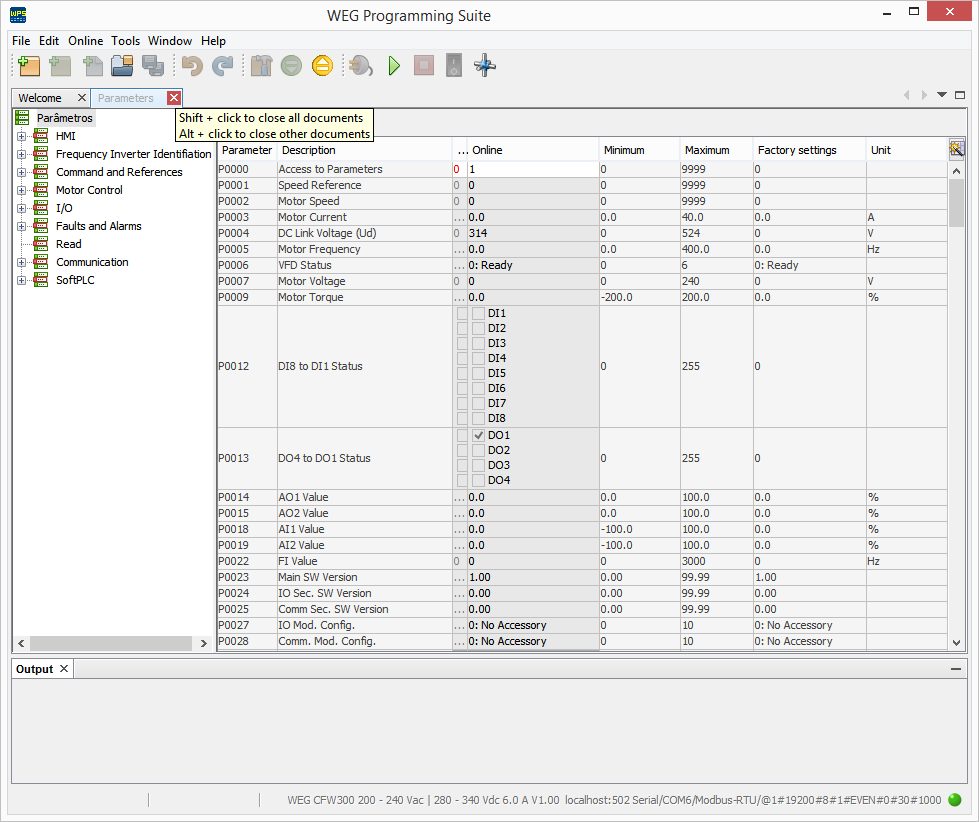
6) Close Window
To end monitoring, click the Close button in the window.
New Configuration
Creates a new configuration.
1) Function Selection
Click the New Configuration option.

From this step onward, see Creating a New Configuration for details.
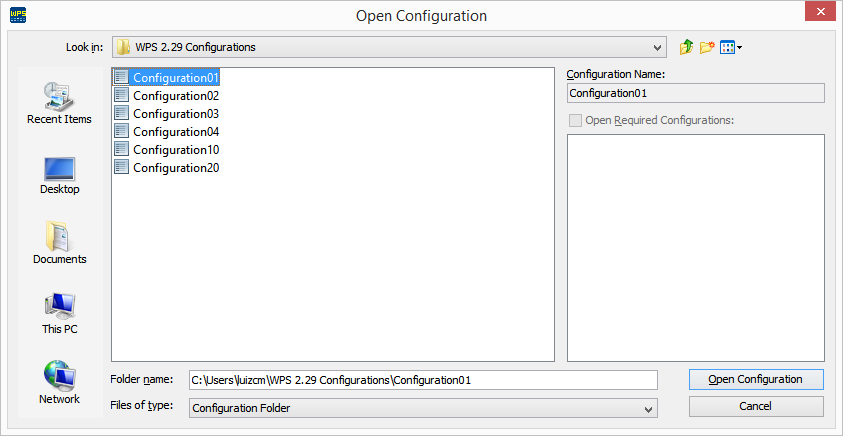
Open Configuration
Allows you to open a previously created configuration.
1) Function Selection
Click the Open Configuration option.

2) Open Configuration Window
A window displays all the configurations created.
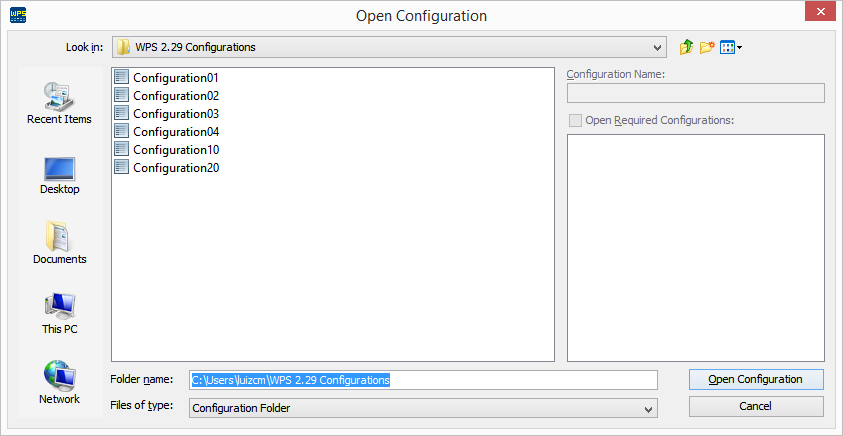
3) Configuration Selection
Select the desired configuration and click the Open Configuration button.
4) Configuration Window
The configuration opens. In the configuration window, you can view the configuration and the features included in the configuration.

Import Configuration
Imports a configuration previously generated by WPS.
1) Function Selection
Click the Import Configuration option.
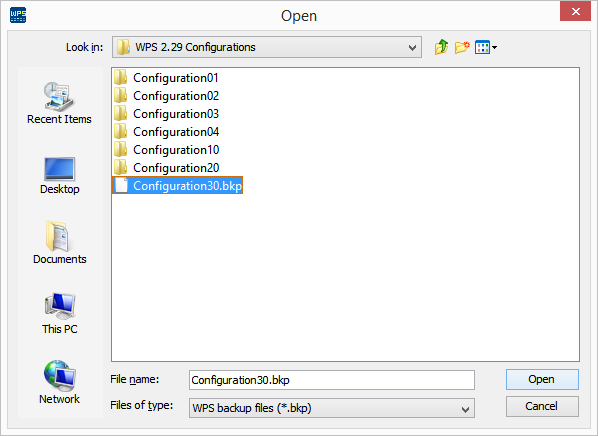
2) Import Window
Click the ... button to open the backup file selection window containing the configuration you want to import.

3) Backup File Selection
Select the bkp file you want to import and click Open.
4) BKP File to Import
The Backup File field is populated with the file selected in the previous step.
Click Next to continue.
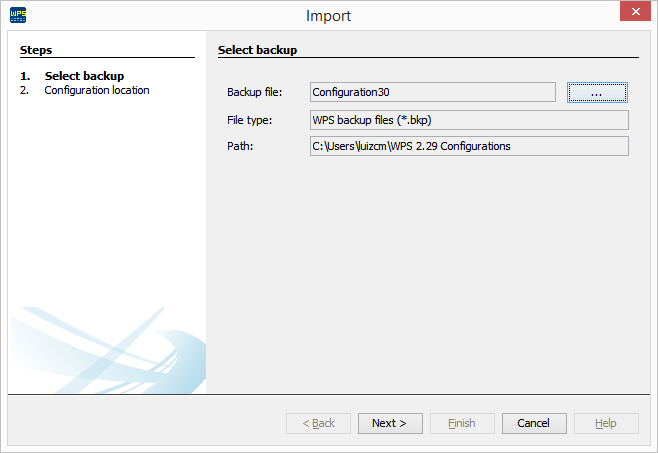
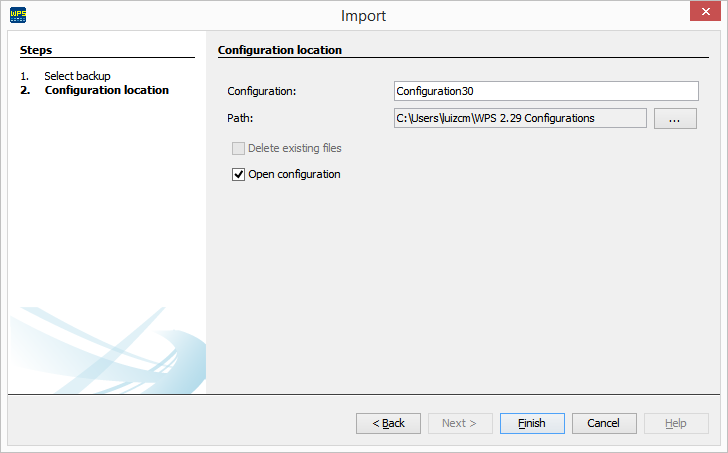
5) Configuration Location
Click Finish to import and complete the wizard.
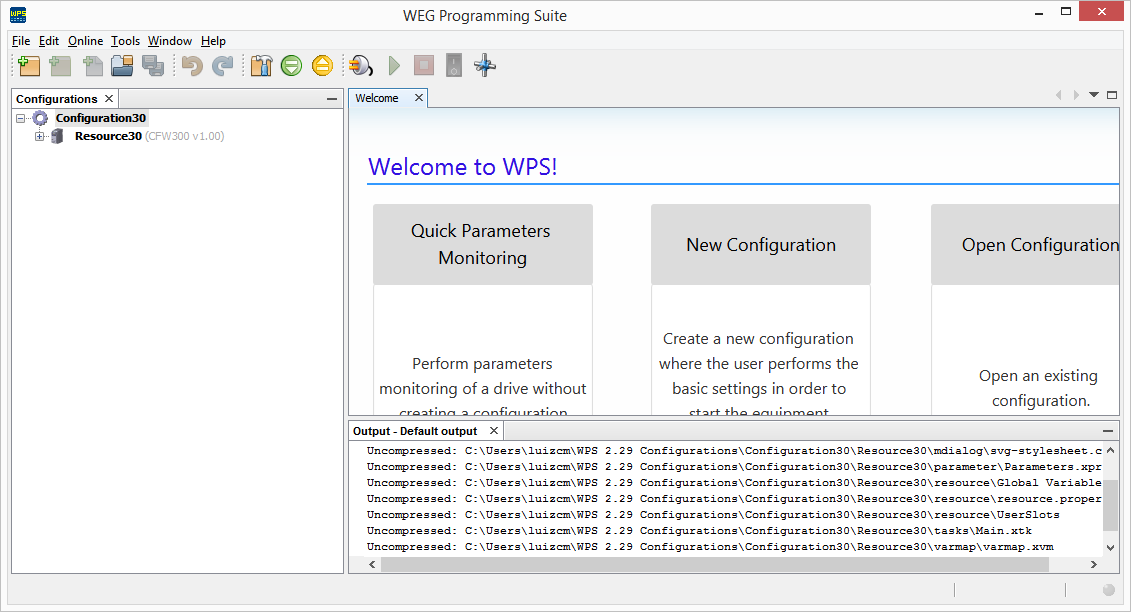
6) Imported Configuration
The import can be viewed in the output window.
In the configuration window, you can view the imported configuration and its resources.
Always Show Welcome Window Option
The Always show welcome window option allows the window to always be displayed when WPS starts.
This option is located at the bottom of the Welcome window.
Uncheck this option to prevent the welcome window from being displayed the next time the program starts.
You can enable this option later in Help > Welcome.
