Nova Configuração _ Equipamento Online
CFW300
No exemplo a seguir, vamos criar uma configuração com CFW300. As janelas poderão ser diferentes se forem configurados outros equipamentos.
1) Botão/Item de Menu Nova Configuração
No menu Arquivo, clique em Nova Configuração.

Você também pode utilizar o atalho do teclado (Ctrl+Shift+C) ou o botão Nova Configuração da Barra de Ferramentas: ![]()
2) Janela Nova Configuração
Aparecerá uma janela para inserção do nome da configuração e do primeiro recurso a ser criado. Insira os nomes nos respectivos campos e clique em Próximo.
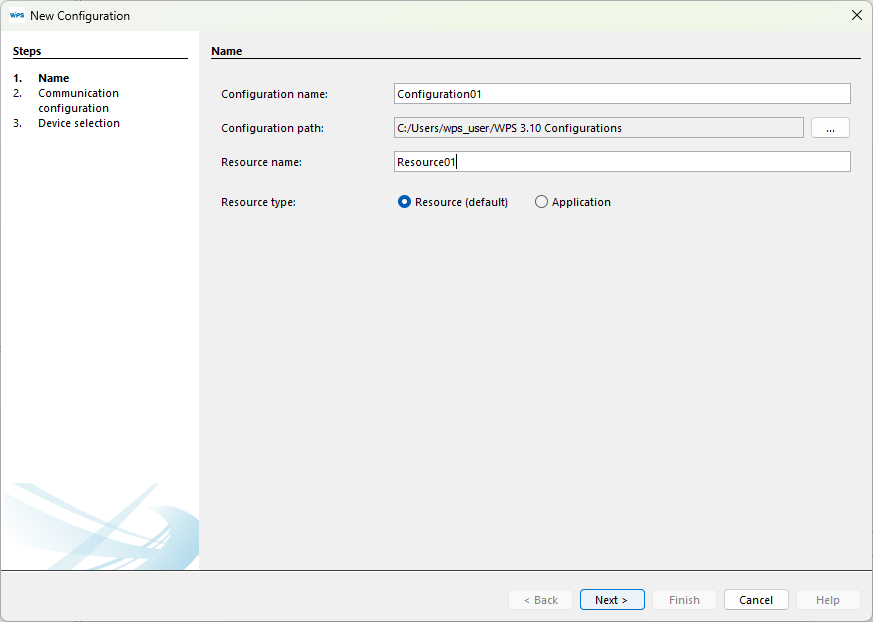
NOTA! Esta janela permite a criação de um Recurso ou de uma Aplicação. Aplicação está restrita a algumas versões de produtos específicos. Consulte o manual do equipamento para mais informações sobre as Aplicações.
3) Configuração da Comunicação
A próxima janela define as opções de comunicação com o equipamento.
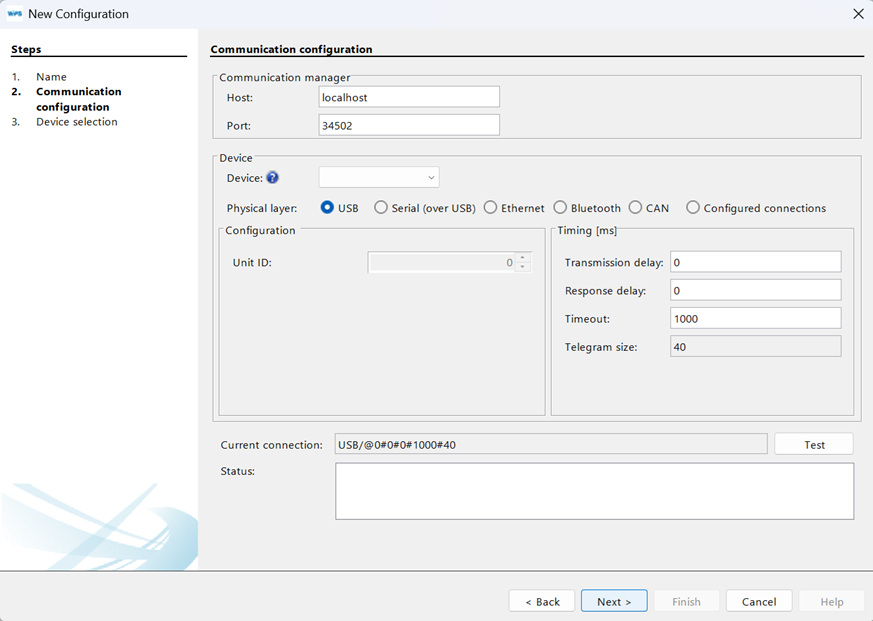
4) Seleção das Opções de Comunicação
Escolha as opções corretas de comunicação.
Se você selecionar um equipamento, a configuração padrão de comunicação do equipamento será carregada na janela.
No entanto, verifique se a configuração da janela é igual ao do equipamento. Se não for, atualize esta janela de acordo com a configuração do equipamento.
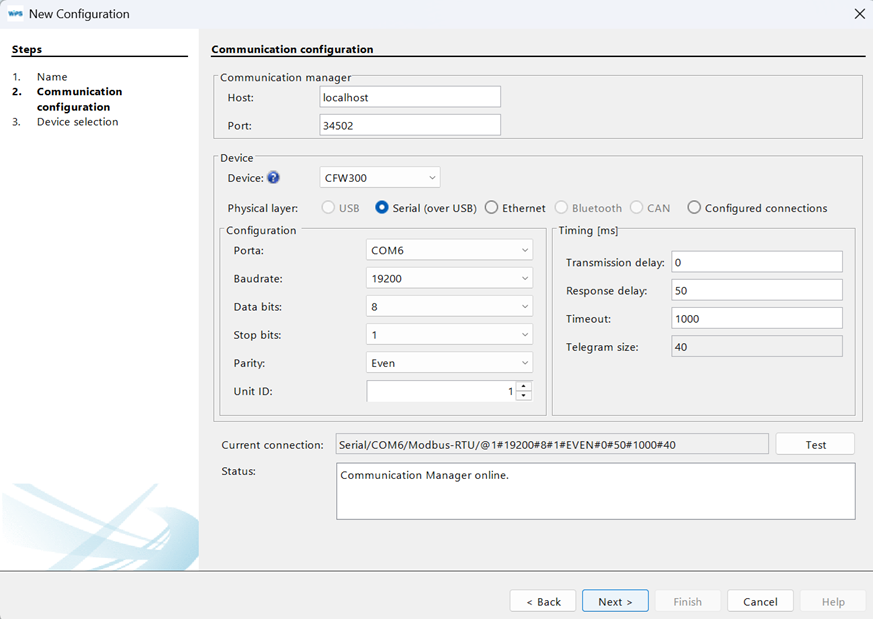
NOTA!
- Neste exemplo, o acessório CFW300_CUSB está sendo utilizado, que no Windows aparece como uma porta serial USB (porta COM virtual);
- Quando o cabo é conectado no microcomputador/equipamento, o gerenciador de dispositivos do Windows informa o nome da porta serial USB criada.
5) Testando a Comunicação
Você pode verificar se a comunicação está correta clicando no botão Testar desta janela.
O campo estado é atualizado. O equipamento conectado aparece no campo estado.
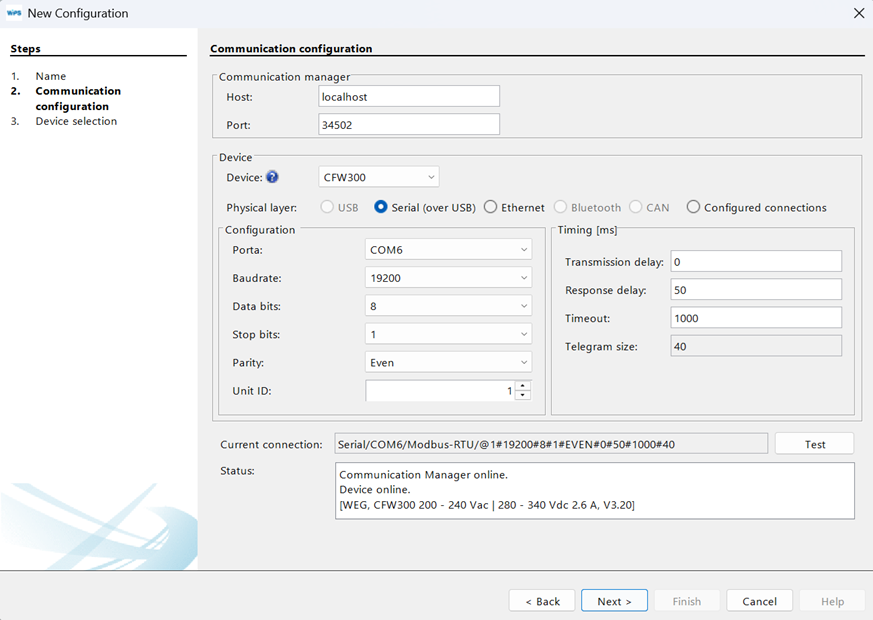
Em seguida clique Próximo.
6) Seleção do Equipamento
A janela apresenta o equipamento que está conectado ao recurso criado.

7) Ler ID
Se você clicar no botão Ler ID, uma janela abrirá com as informações do equipamento. Clique OK para fechar.

Para ir para a próxima etapa, clique Próximo.
8) Importar do WLP
Uma nova janela aparece onde é possível importar um projeto Ladder do CFW100 desenvolvido no WLP (WEG Ladder Programmer).
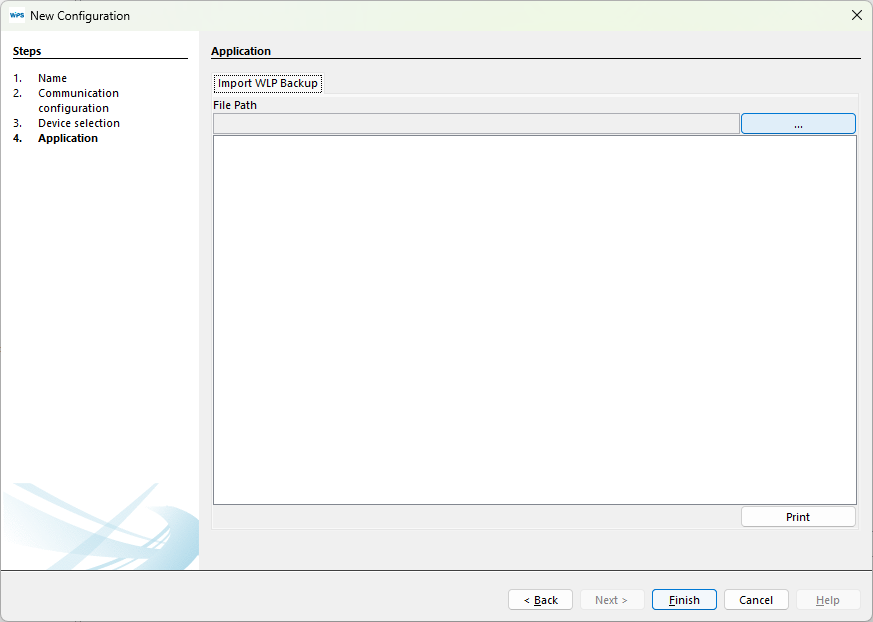
Clique Finalizar para concluir o assistente.
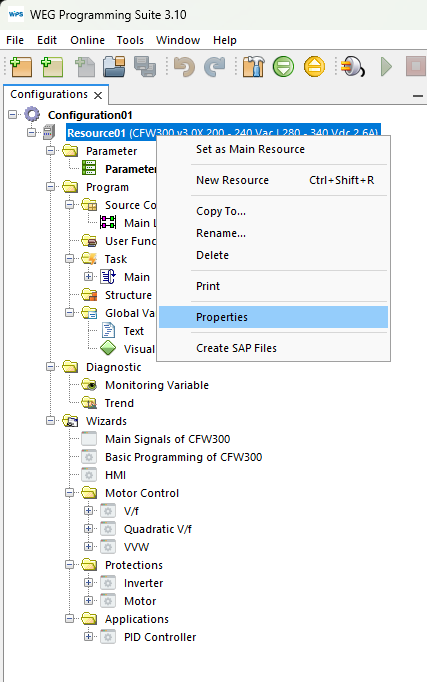
9) Árvore de Configurações
Ao fim destes passos, a árvore com as configurações deve estar parecida com a da imagem a seguir.

10) Propriedades do Recurso
As configurações realizadas no setup podem ser alteradas posteriormente em propriedades do recurso.
NOTA!:Dependendo do equipamento, novas janelas podem aparecer deste passo em diante, com configurações iniciais e start-ups orientados.