Estabelecendo comuicação RS232
O equipamento deve estar localizado à uma distância do computador conforme tabela abaixo.
| Taxa de Transmissão (bps) | Tamanho Máximo do Cabo (pes) | Tamanho Máximo do Cabo (m) |
|---|---|---|
| 9600 | 32.81 | 10 |
| 19200 | 24.93 | 7.6 |
| 38400 | 12.14 | 3.7 |
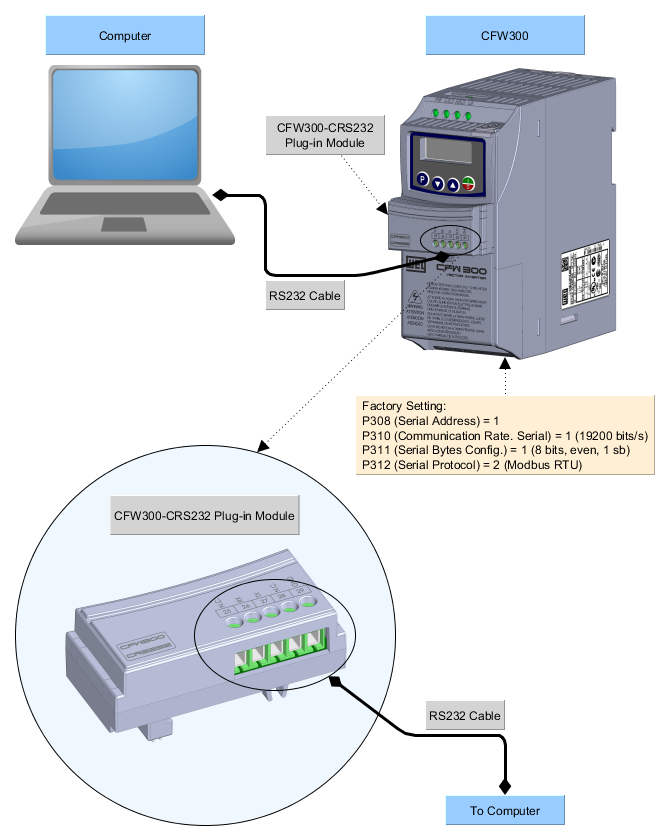
CFW300
1) Conexão do Computador ao Equipamento
A figura abaixo mostra como conectar um computador ao equipamento via RS232.
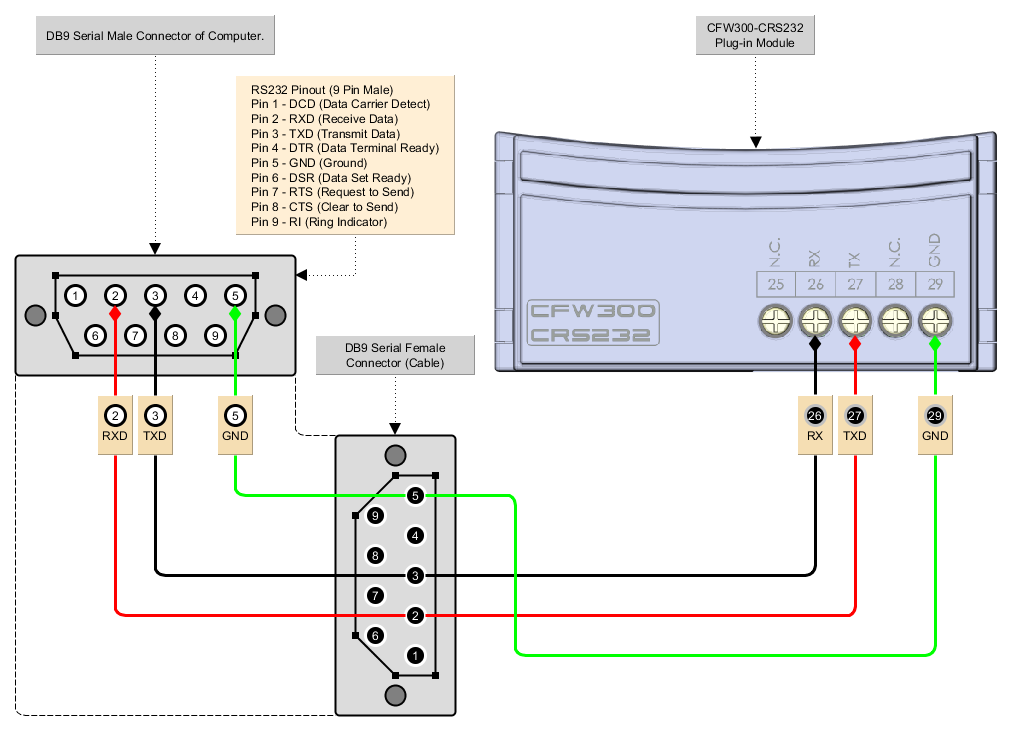
2) Conexão Computador - Módulo Plug-in
A figura abaixo mostra detalhes da conexão.
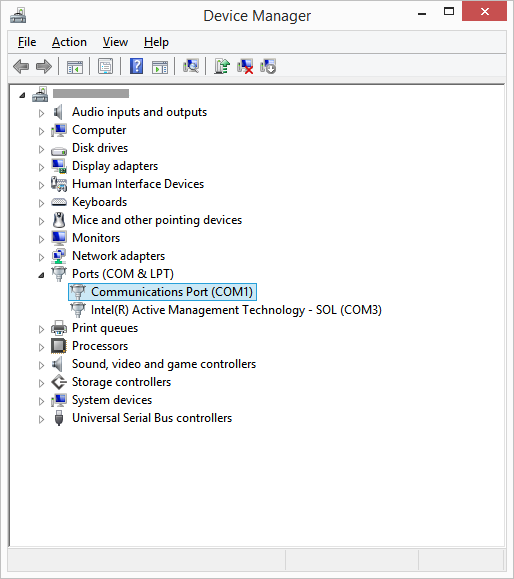
3) Gerenciador de Dispositivo do Windows
Gerenciador de dispositivo do Windows indica a porta serial conectada ao equipamento.O nome do computador no gerenciador de dispositivo está propositalmente ilegível.
4) Configuração da Comunicação no WPS
No WPS, selecione a porta serial corretamente na janela Propriedade > Configuração da Comunicação conforme a seguir.

ℹ️ Nota: Desligar o equipamento antes de fazer as conexões.
5) Conectando o Equipamento
- Faça as ligações do conector DB9 femea serial do cabo RS232 ao acessório CFW300-RS232 conforme apresentado nas figuras anteriores;
- Insira o conector DB9 femea do cabo RS232 no conector DB9 macho do computador;
- No gerenciador de dispositivo verifique qual porta serial está conectada;
- Certifique-se que na categoria Configuração de Comunicação da janela Propriedades do recurso, a conexão serial esteja selecionada;
- A porta serial e sua configuração do recurso no WPS deve ser a mesma porta serial que aparece no gerenciador de dispositivo do Windows, onde o cabo RS232 está conectado;
- Nunca alterar valores nos parâmetros P308, P310, P311 e P312 durante uma conexão. A alteração destes parâmetros causa a perda instantânea de comunicação entre o PC e o equipamento.