|
With the Keyboard |
  
|
|
With the Keyboard |
|
Browsing with the keyboard in the rung is done by the keys ![]() ,
, ![]() ,
, ![]() ,
, ![]() . Through these keys, it is possible to select several elements inside the rung, and also define the insertion point of new elements.
. Through these keys, it is possible to select several elements inside the rung, and also define the insertion point of new elements.
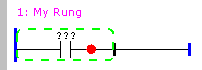
As shown in the item previous to insert an element of the contact type in the rung, it will become as follows.
By pressing the browsing keys, we can modify the insertion point of a new element, as shown in the following figures:
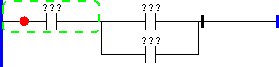
Key ![]() indicates that the new element will be inserted before the selected element
indicates that the new element will be inserted before the selected element
![]()
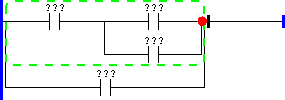
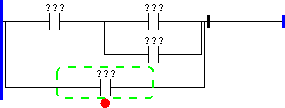
Key ![]() indicates that the new element will be inserted parallelly above the selected element
indicates that the new element will be inserted parallelly above the selected element
![]()
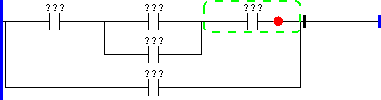
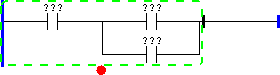
Key ![]() indicates that the new element will be inserted parallelly below the selected element
indicates that the new element will be inserted parallelly below the selected element
![]()
Key ![]() indicates that the new element will be inserted after the selected element
indicates that the new element will be inserted after the selected element
![]()
As the insertion point has already been selected, and by pressing the same key as the corresponding direction, the selection will move on to the next element, as shown in the following figure.
![]()
When inserting elements to the browser in parallel through the elements, we browse through each element individually, conforming to the following example.

In this situation, when inserting an element, we are making this insertion related to this element. Should it be necessary to insert an element related to the parallel that is a group of elements, we must use the G key, which will select the group, and then we can define the insertion point, and make the insertion as shown in the following figures.
Pressing G:

Inserting contact before the parallel:
Every time the G key is pressed, we select the group immediately above the selected element/group, and in the end, we go back to the original element, so, in some situations, it is necessary to touch the G key more than once. Through the G key it is possible to make many insertion operations conforming to the following examples.
Insert an element in parallel to the group of elements in the rung
Insert an element in series to the group formed by elements that are internal to a parallel