|
Overview |
  
|
|
Overview |
|
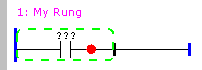
In order to insert an element in the rung, it is necessary that an already existing element is selected, as shown in the following figure.
![]()
The selected element will be involved by a green, striped rectangle. There will also be a red dot indicating where the new element will be inserted (insertion point).
The insertion of Ladder elements may be performed in three distinct ways.
| 1. | With the keyboard through the following shortcuts |
key: C - insert contact
key: F - insert functional block
key: O - insert output coil
key: X - change ladder element
| 2. | With the Ladder/rungs editor tool bar |
![]() - Insert a contact in the rung
- Insert a contact in the rung
![]() - Insert a functional block in the rung
- Insert a functional block in the rung
![]() - Insert an output coil in the rung
- Insert an output coil in the rung
![]() - Change ladder element
- Change ladder element
| 3. | With the palette of Ladder elements |
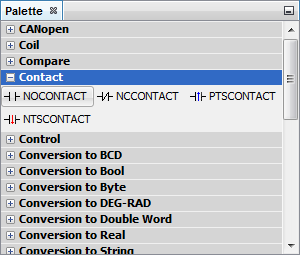
A mouse drag and drop operation must be used in order to insert elements using the palette. For that purpose, click on the palette element, keep the mouse pressed, move the mouse up to the insertion point in the Ladder, and release the mouse button.
After inserting an element, e.g. a contact, the rung will become as follows.