|
Establishing Communication - USB Serial Port |
  
|
|
Establishing Communication - USB Serial Port |
|
The USB serial port is known as Virtual Com Port.
The equipment must be closer than three meters to the computer.
This connection is done by means of USB Cable.
USB Driver: it is necessary to install the USB FTDI drive available in the folder USB_Driver\FTDI.
CFW300
1) Connection of the Computer to the Equipment
The figure below shows how to connect a computer to the equipment via USB.

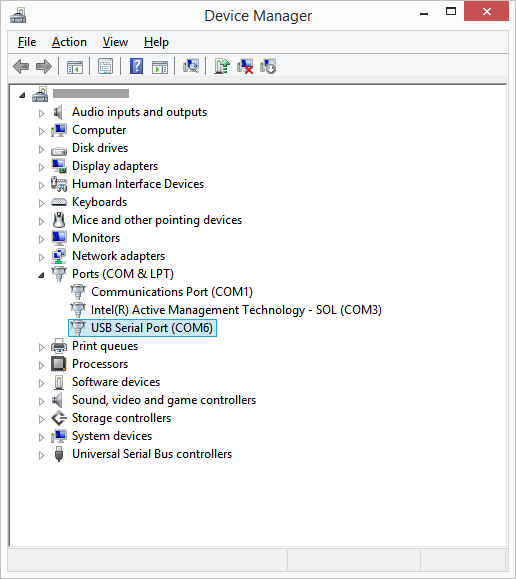
2) Windows Device Manager
The Windows device manager indicates the serial port connected to the equipment.
The computer name on the device manager is illegible on purpose.
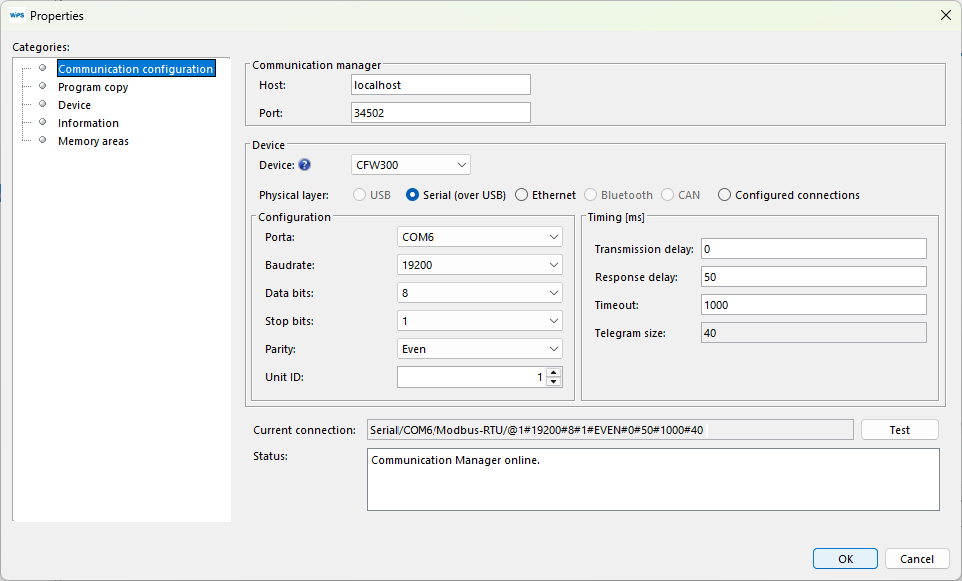
3) Communication Configuration on the WPS
On the WPS, select the serial port correctly in the window Property > Communication Configuration as follows.
|
NOTE! Turn off the device before connecting accessories or before connecting wires, then re-power the device before testing communication. |
4) Connecting the Equipment
| 1. | Insert the mini-B* connector of the USB cable into the USB connector of the equipment; |
| 2. | Insert the A-type connector of the USB cable into the computer USB port; |
| 3. | In the device manager, check which serial port is connected; |
| 4. | Make sure that the serial connection is selected in the Communication Configuration category of the resource Property window; |
| 5. | The serial port and its resource configuration on the WPS must be the same serial port that appears in the Windows device manager where the USB cable is connected; |
| 6. | Never change the values in parameters P308, P310, P311 and P312 during a connection. Changing those parameters causes the immediate loss of communication between the PC and the equipment. |
* Depending on the device, the connection will be made using a type B or type C connector.