Create a configuration
Use this workflow to create a new configuration and its first resource.
A configuration is the top-level project container in WPS. During creation, WPS also creates the first resource, asks for the communication settings, and allows you to confirm the target device information.
Before you start
Prepare the following information before opening the wizard:
- The configuration name
- The name of the first resource
- The target device or product family
- The communication method you plan to use
- Whether the device is currently connected
The screenshots in this page use CFW300 as an example. The exact wizard screens may differ for other products.
You can open the wizard from Menus > File > New Configuration, by pressing Ctrl+Shift+C, or by using the New Configuration button on the toolbar.
Creation workflow
Use the common steps below to create the configuration, define the first resource, and enter the initial communication settings. Then follow the tab that matches whether the target device is currently connected.
Step 1 — Open the wizard
In the main menu, click File > New Configuration.

You can also use the toolbar button ![]() or the keyboard shortcut (Ctrl+Shift+C).
or the keyboard shortcut (Ctrl+Shift+C).
Step 2 — Name the configuration and the first resource
Enter the configuration name and the name of the first resource, then click Next.

This dialog can create either a Resource or an Application. Application support is limited to specific product families and firmware combinations.
Step 3 — Open the communication setup page
The next wizard page defines how WPS communicates with the equipment.

Step 4 — Select the communication options
Choose the communication settings for the device.
If you select a product preset, WPS loads its default communication profile. Review the loaded values before continuing.
Typical fields to confirm include:
- Selected device preset
- Physical layer
- Serial or network parameters
- Port or adapter assignment
- Timing values, when applicable
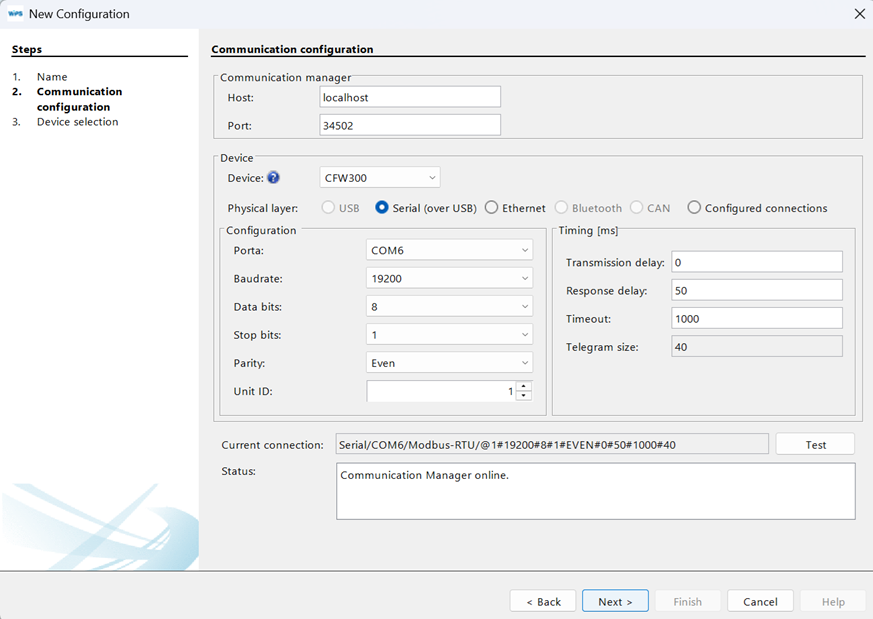
When the device is connected, confirm the actual port or adapter assigned by the operating system. When the device is not connected yet, some values may need to be revised later.
At this point, the workflow changes depending on whether the target device is currently connected to the computer.
If the device is available and connected, follow With a Connected Device. In this mode, WPS can test communication, detect the equipment, and validate part of the configuration during creation.
If the device is not connected yet, follow Without a Connected Device. In this mode, you can still create the configuration and define the initial settings, but communication tests and device validation must be completed later.
- With a Connected Device
- Without a Connected Device
Step 5 — Test communication
Click Test to verify that WPS can reach the device. When the connection is valid, the status field is updated with the detected equipment information.
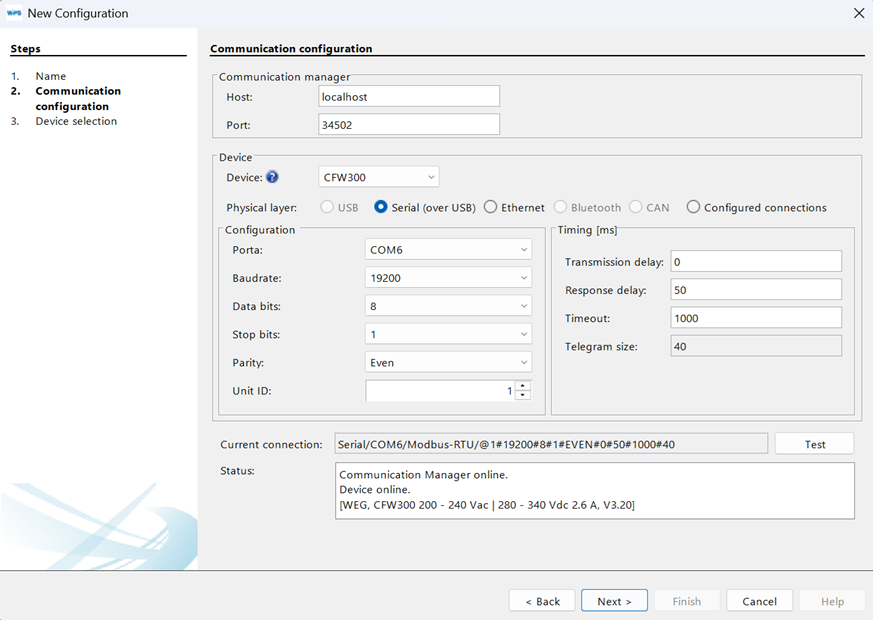
After a successful test, click Next.
Step 6 — Review the detected device
The next page shows the equipment associated with the created resource.
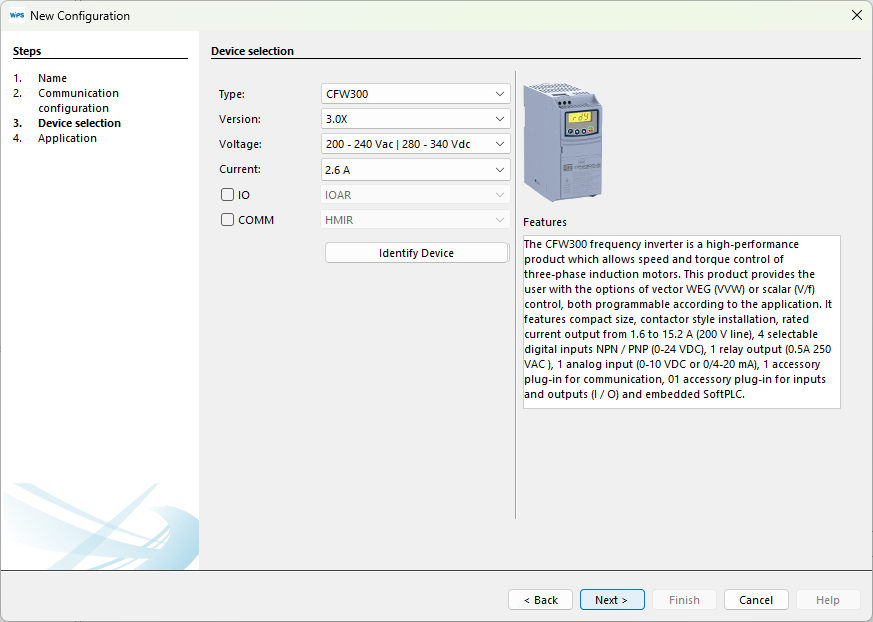
Step 7 — Identify Device
Click Identify Device if you want to confirm the device identity before continuing.
This action displays information such as the detected model and firmware version.

Click Next to continue.
Step 5 — Test communication in offline mode
If you click Test while the equipment is not connected, the status indicates that the equipment is offline.
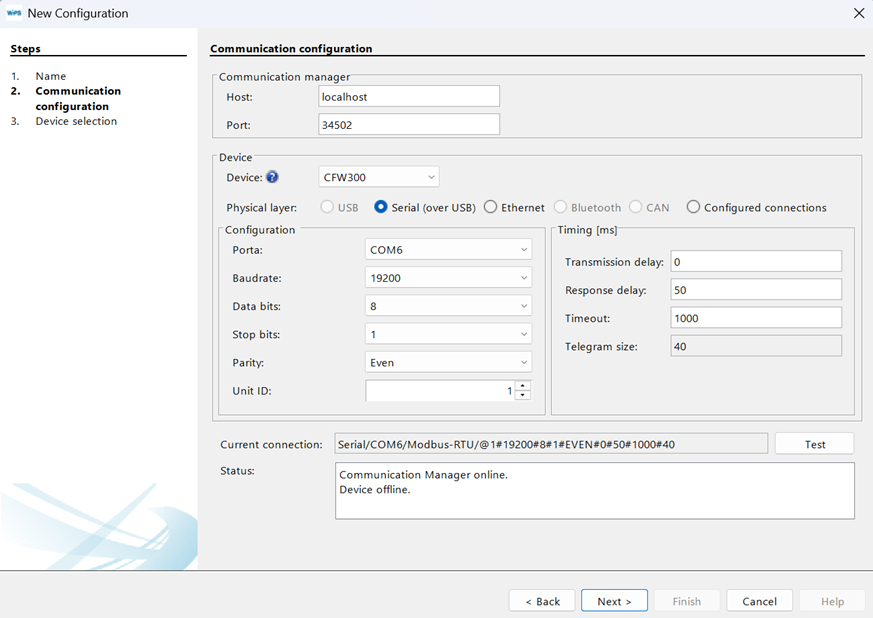
This does not prevent project creation. It only means that connectivity has not been validated yet.
Step 6 — Define the equipment manually
The next page allows you to review or define the equipment associated with the resource.
When the device is offline, fill in the required information manually.
Step 7 — Understand "Identify Device" behavior in offline mode
If you click Identify Device without a connected device, WPS shows a connection failure message.

After acknowledging the message, click Next.
Step 8 — Optional WLP import
For supported products, WPS can import a ladder project from WLP (WEG Ladder Programmer).
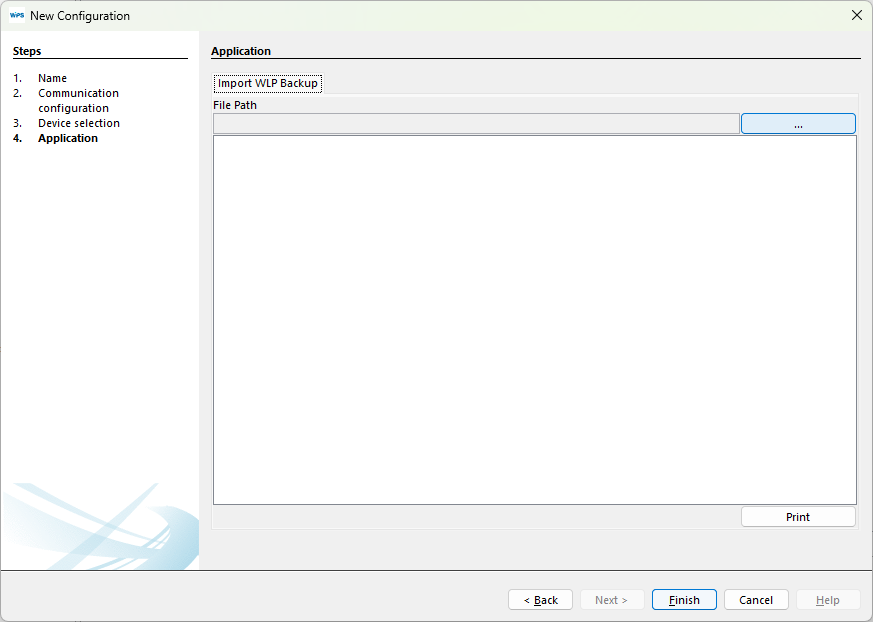
To import an existing WLP project, click Import from WLP and select either a WLP project folder or a WLP backup file.
For the full procedure, see Import from WLP.
If you do not want to import a WLP project, skip this step and click Finish to close the wizard.
Step 8 — Optional WLP import
For supported products, WPS can import a ladder project from WLP (WEG Ladder Programmer).
Click Finish to close the wizard.
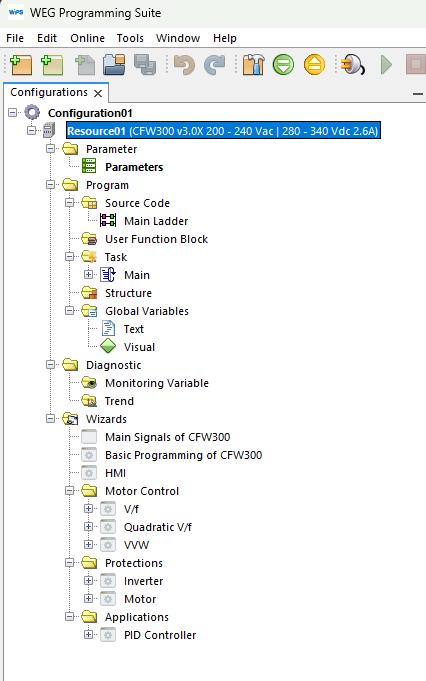
Step 9 — Confirm the configuration tree
When the wizard completes, the new configuration and its first resource should appear in the configuration tree.
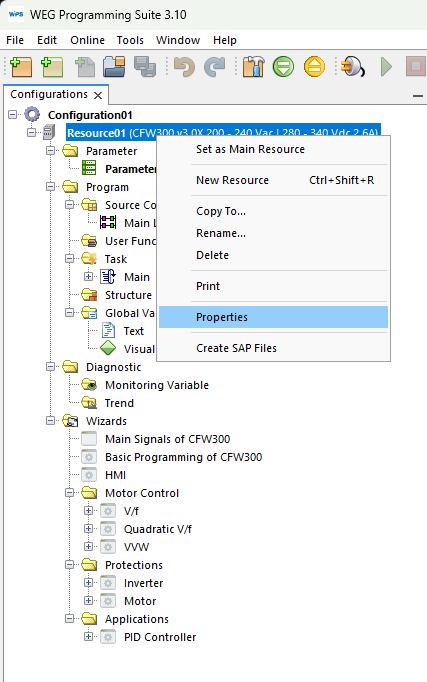
Step 10 — Review resource properties
The options chosen during the wizard can be changed later in Resource Properties.
Expected result
At the end of the workflow, you should have:
- One new configuration
- One new resource
If the device was connected during creation, the resource should also include validated communication settings and detected device information.
If the device was not connected during creation, the project should contain provisional communication values and a structure ready for later validation.
If communication succeeds during creation, keep the tested configuration unchanged until the first download or commissioning step is complete.
An offline configuration can be created successfully, but communication settings, equipment identity, and connection status still need to be validated before commissioning or online operations.
After the wizard
Once the configuration exists, the next typical tasks are:
- Add another resource;
- Review the resource properties
- Import an existing backup
- Export the configuration for backup or deployment
Create a Resource
Add additional resources to an existing configuration.
Context Menus
Use quick actions for configurations and resources.
Import and Export
Back up, restore, or package projects and binaries.
Import From WLP
Import a ladder project from WLP during resource creation.