Firmware Update — CFW500
For CFW500, use the accessory connected to Serial Port 1 with the following settings: baud rate 38400 bps, even parity, and 2 stop bits. An isolated USB-to-RS485 converter is mandatory for firmware update with this configuration, even when using a CFW500-CUSB accessory.
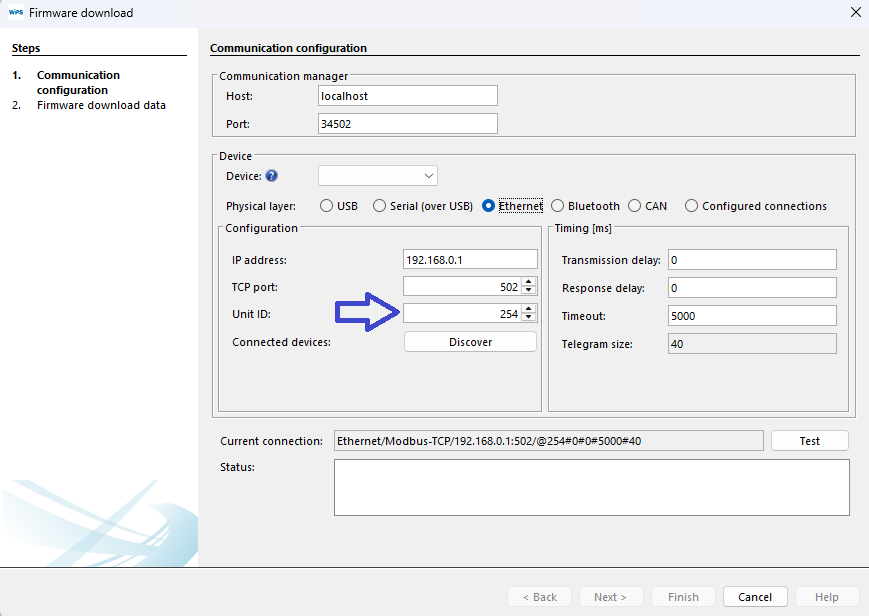
To update the CFW500-CETH2 Ethernet accessory firmware, set ID 254 in the communication settings. Consult the product manual for the IP address and port configuration parameters P0810 to P0815 and P0865.
In the example below, these parameters define IP address 192.168.0.14 and TCP port 502.
Firmware update procedure
The screenshots in this procedure were captured from a CFW300 and are provided as visual reference only. The WPS wizard uses the same firmware update flow for supported devices. Because this documentation covers many devices with the same interaction pattern, the screenshots are not duplicated only to change the product name. Apply the requirements listed on the device-specific page before starting the update.
The firmware update will not be completed if the binary file is incompatible or corrupted. Before updating firmware, stop program execution and make sure the device is not operating or driving a motor.
Before you begin
The firmware update is started from the Online menu in WPS. The procedure does not require an existing WPS project or an existing resource in the workspace.
Before starting, make sure you have:
- The firmware binary provided by the supplier or technical support.
- The device connected to the computer.
- The device powered on.
- The communication settings required by the device or accessory being updated.
- The setup information from the Technical Support Manual for Firmware Update via WPS, available from the WEG website.
Firmware update procedure
1. Connect and power the device
Connect the device to the computer and make sure the device is powered on.
You do not need to create or open a WPS project before starting the firmware update.
2. Configure communication in WPS
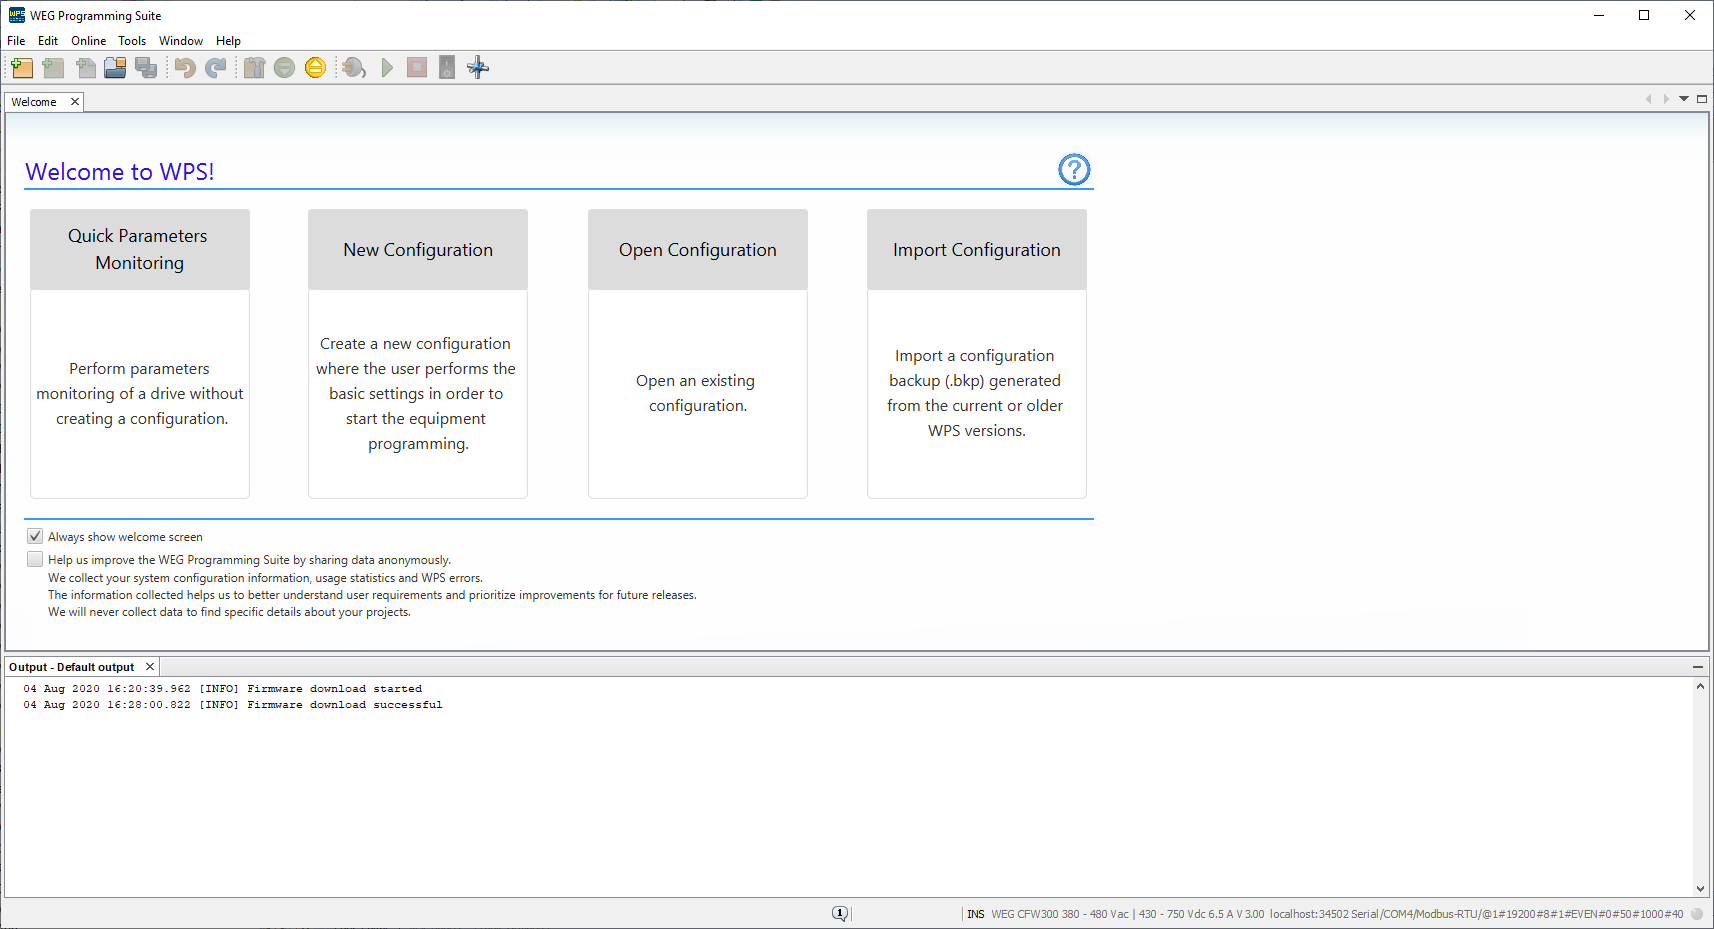
In WPS, open the firmware download workflow:
From the Top Menu, go to Online > Firmware Download.
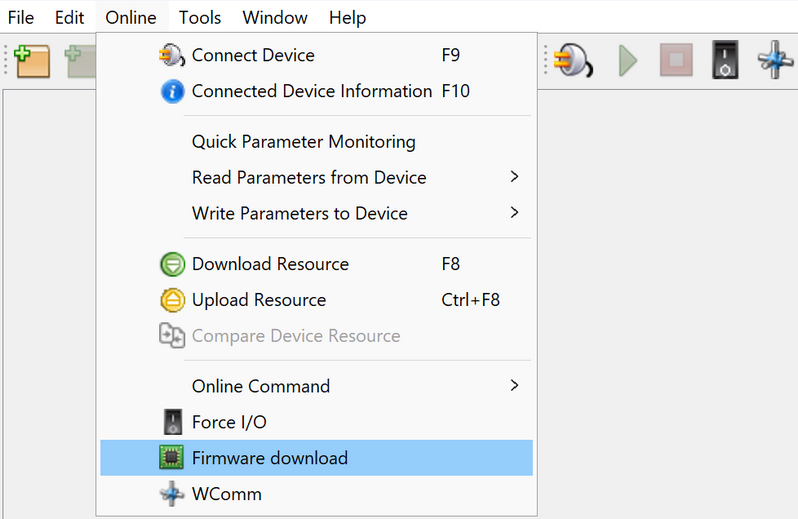
The communication configuration screen will be displayed.
In this screen, configure communication for the target device:
- Select the device from the device list.
- Select the physical layer.
- Adjust any additional communication settings required by the selected product, physical layer, or accessory.
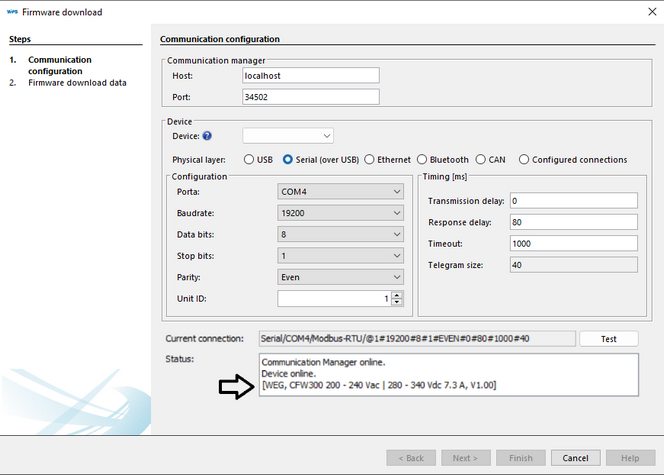
- Click Test to verify communication between WPS and the device.
3. Continue after a successful communication test
If WPS can communicate with the device, the Next button is enabled.
Click Next.

4. Choose the firmware source
- WPS Firmware Version
- Firmware File
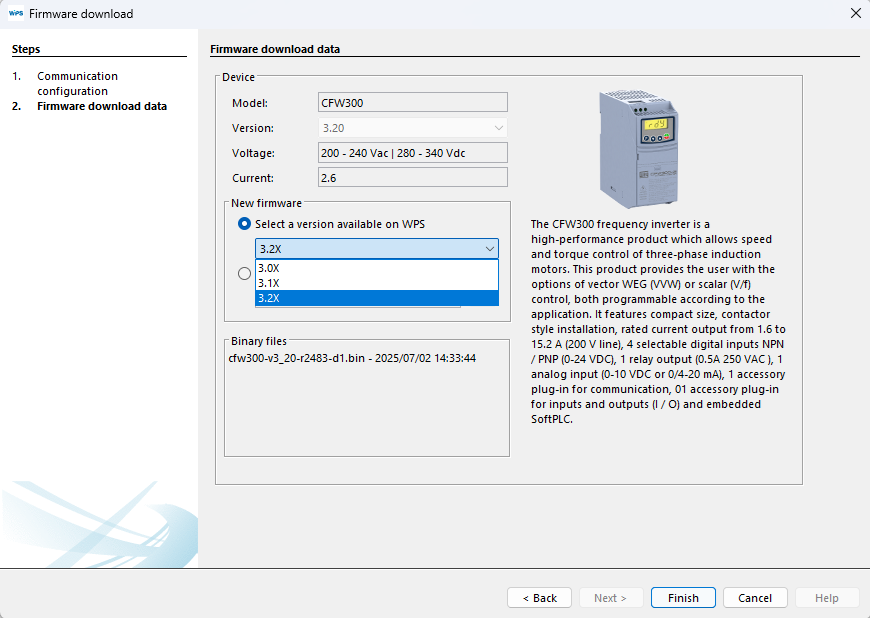
Select a firmware version available in WPS by using the firmware-version selector.
If the firmware-version selector is disabled, WPS may be outdated. Update WPS to access the latest firmware update features and corrections by opening Quick Start > Check for Updates and completing the update flow.
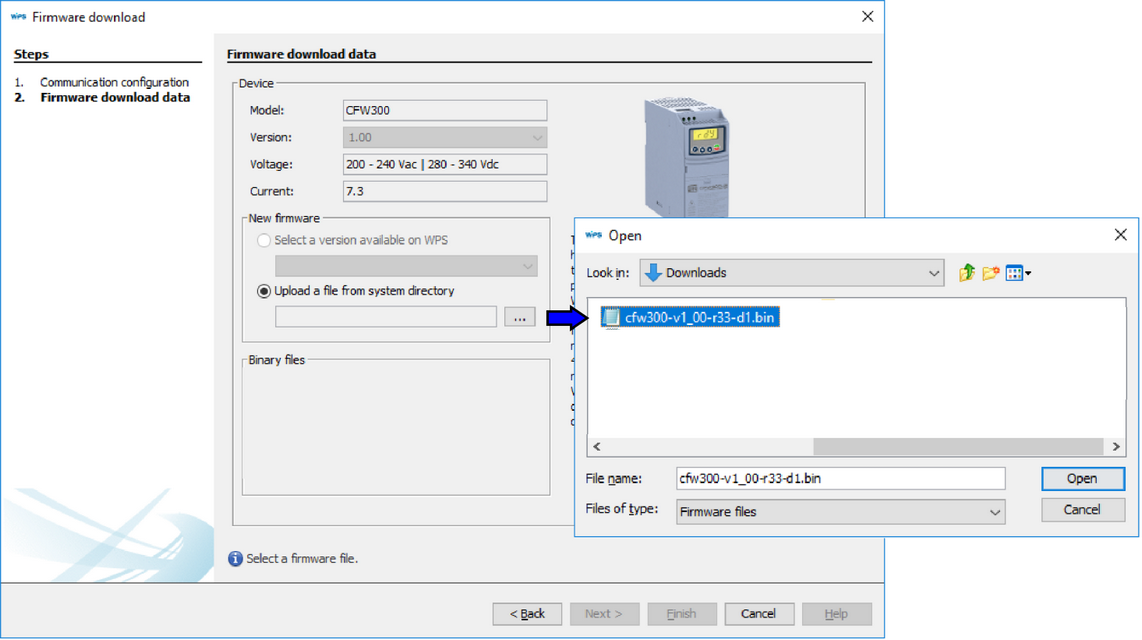
Click ... and select the firmware file previously provided by the supplier or technical support.
Expected file extension for this page: .fw or .bin.
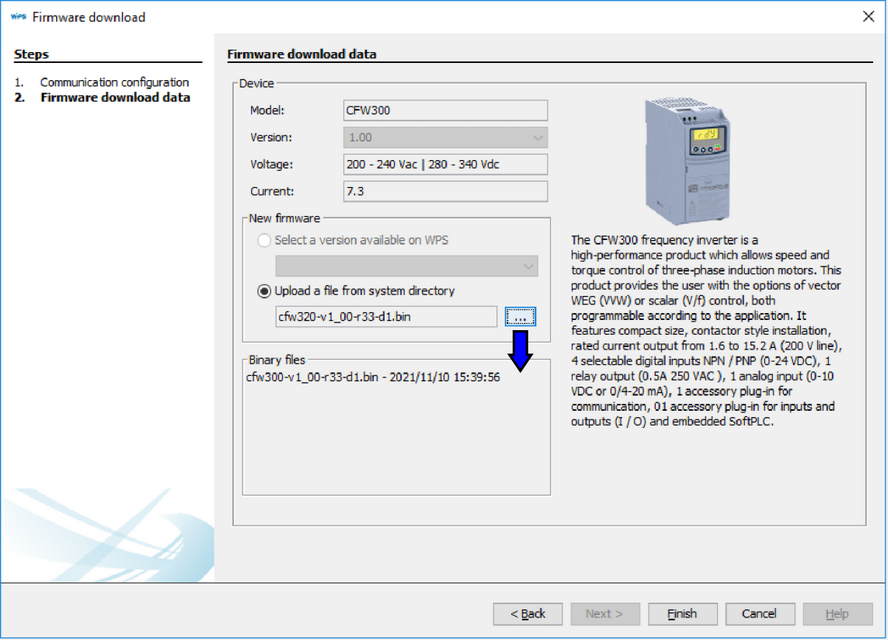
5. Review the firmware information and start recording
After the firmware file or WPS firmware version is selected, WPS displays the firmware information below the selected source.
Click Finish to close the wizard and start recording the firmware.
6. Confirm the firmware update
WPS displays a confirmation message.

Click OK to confirm.
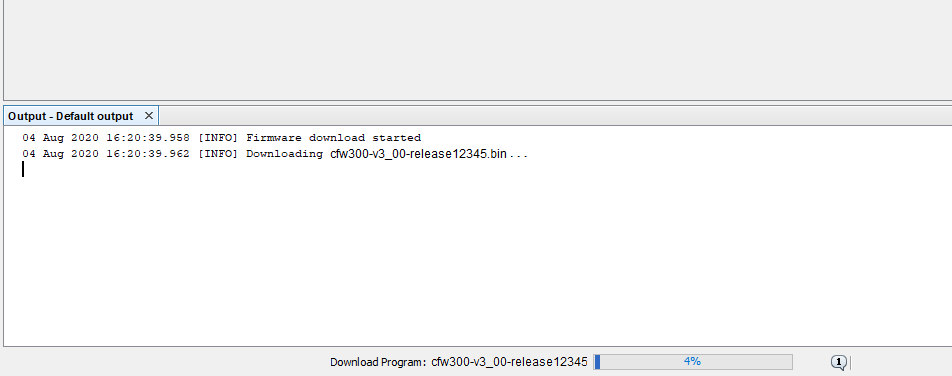
7. Wait for the firmware recording process
The firmware recording process starts.
Wait until the process is complete. WPS shows progress information in the Output window and in the status bar.
8. Complete the update and restore communication if required
When the firmware recording process is complete, WPS displays a completion message in the Output window. Depending on the device, the device resets or displays an HMI message requesting a restart.
After the reset or restart, you may need to configure the communication parameters again before the device can communicate with WPS.